You have no items in your shopping cart.
08
May
Backgrounds – Brayer
Materials
- Base Card (21 x 14.5cm)
- Matching or Contrasting Card (9.5 x 13.5cm)
- White Card (8.5 x 12.5cm)
- Pigment inkpad
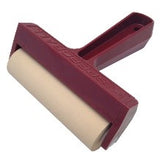
- Brayer or rubber roller
- Embellishments:
- Stamps and Die Shapes for decoration
- Sentiment/ Greeting Stamps
- Double sided tape and glue for attaching.

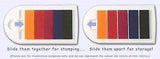
- Open inkpad and push the slider to move the individual ink pads together
- With the brayer/rubber roller edge aligned to the edge of the inkpad roll across inkpad and start again from the beginning so that all the roller is covered (do not roll back and forth).
- Roll the brayer along the edge of the white card and without lifting roll back and forth until ink is transferred to the card. This will give the card a striped effect
- Re-ink the roller in the same place and repeat.
- When you have the amount of colour you wish, reink in the same place and repeat across the next section of card, until the card is covered.
- Allow to dry. If stamping directly onto the pigment ink, use a heat tool to dry.
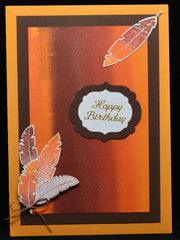
- Assemble card layers.
- Stamp and die cut your embellishments and place on the card.
- Sentiment - Ink your stamp well with Stazon black ink and stamp on your card.
- Clean stamp immediately with Stazon cleaner

Inkpad storage:
Use the slider to re-open the ink pads so they are no longer touching for storage.
Make sure you store your inkpads upside down, so the ink stays in the pad and not at the bottom of it.